Overview
This guide explains how to integrate Kenjo with Mobilic to ensure full compliance with time tracking regulations. With this page:
You’ll learn:
How to set up the integration
How to invite employees to Mobilic
How time tracking works with Mobilic-specific fields
How employees approve their time entries
How managers approve employee time
Note: After setting up the integration, you and your employees will only use Kenjo. No need to switch between platforms! We’ll make sure that all entries are synced with Mobilic.
Learn How to Set Up the Integration
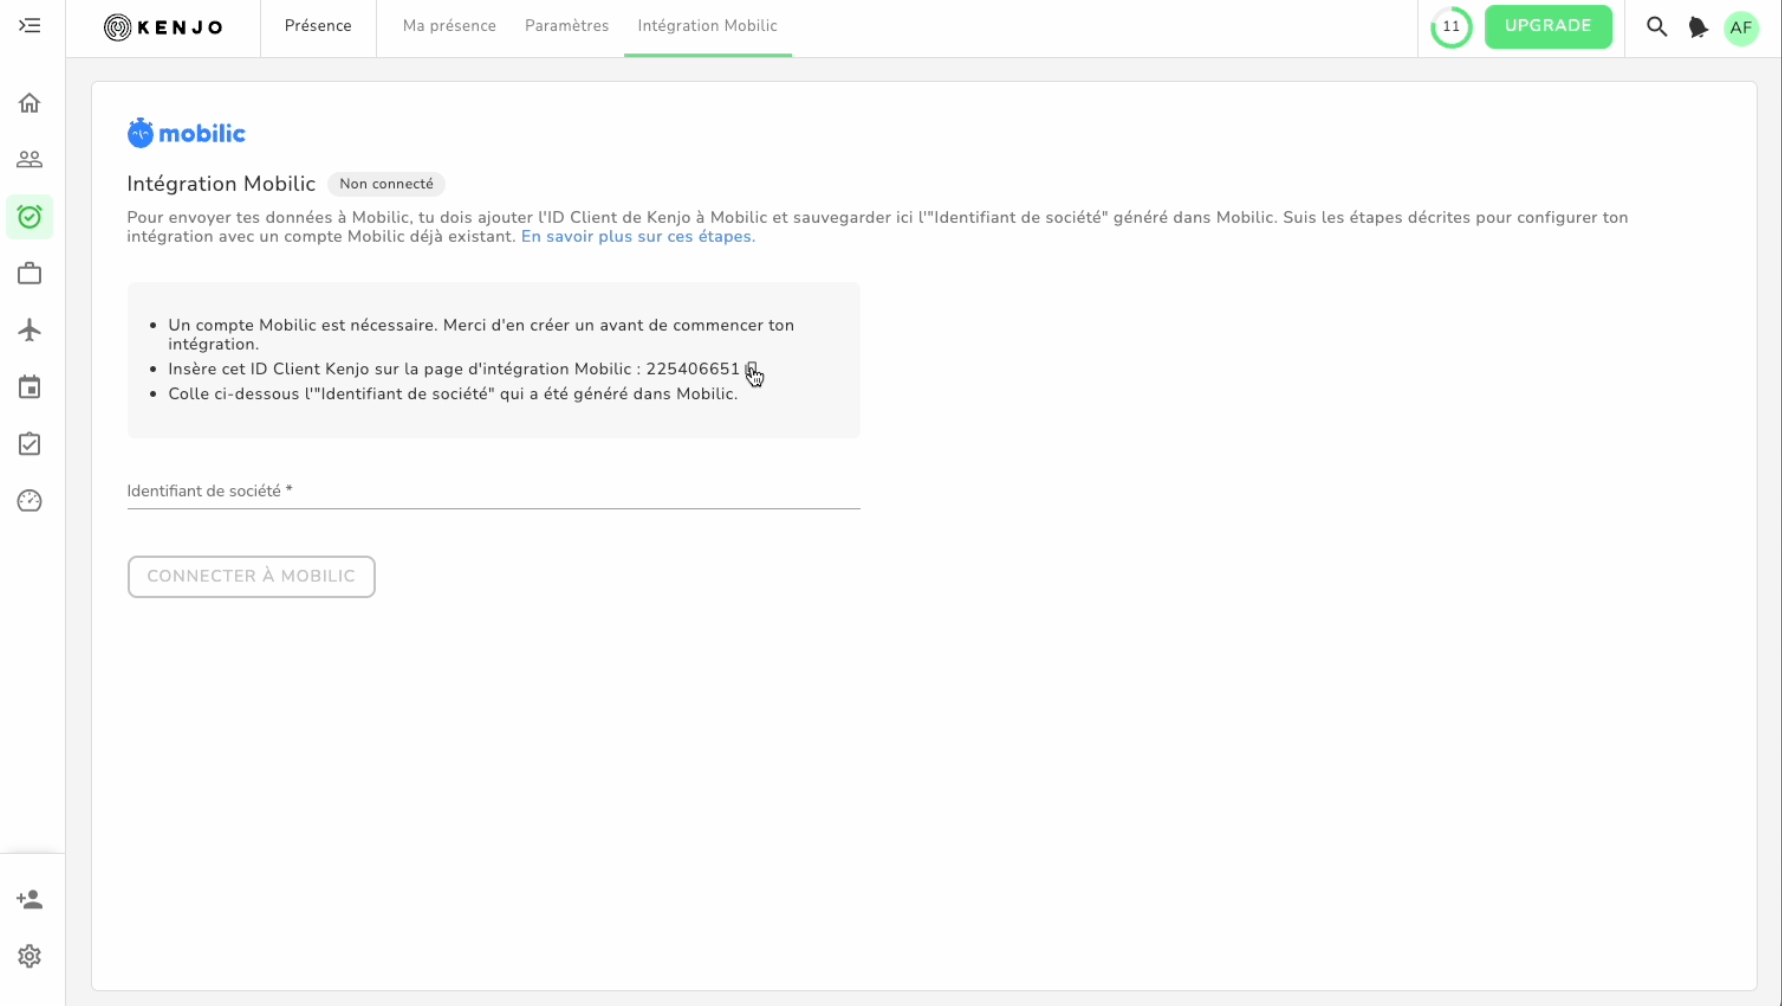
Go to Kenjo > Settings > Integrations
Find and activate the Mobilic integration

You’ll see the Mobilic integration overview page
Follow the steps below to complete the setu
Important: You need a Mobilic account to set up the integration. If you don’t have one yet, please create it first.
Steps to Connect Kenjo and Mobilic
In Kenjo, copy the "Client ID"

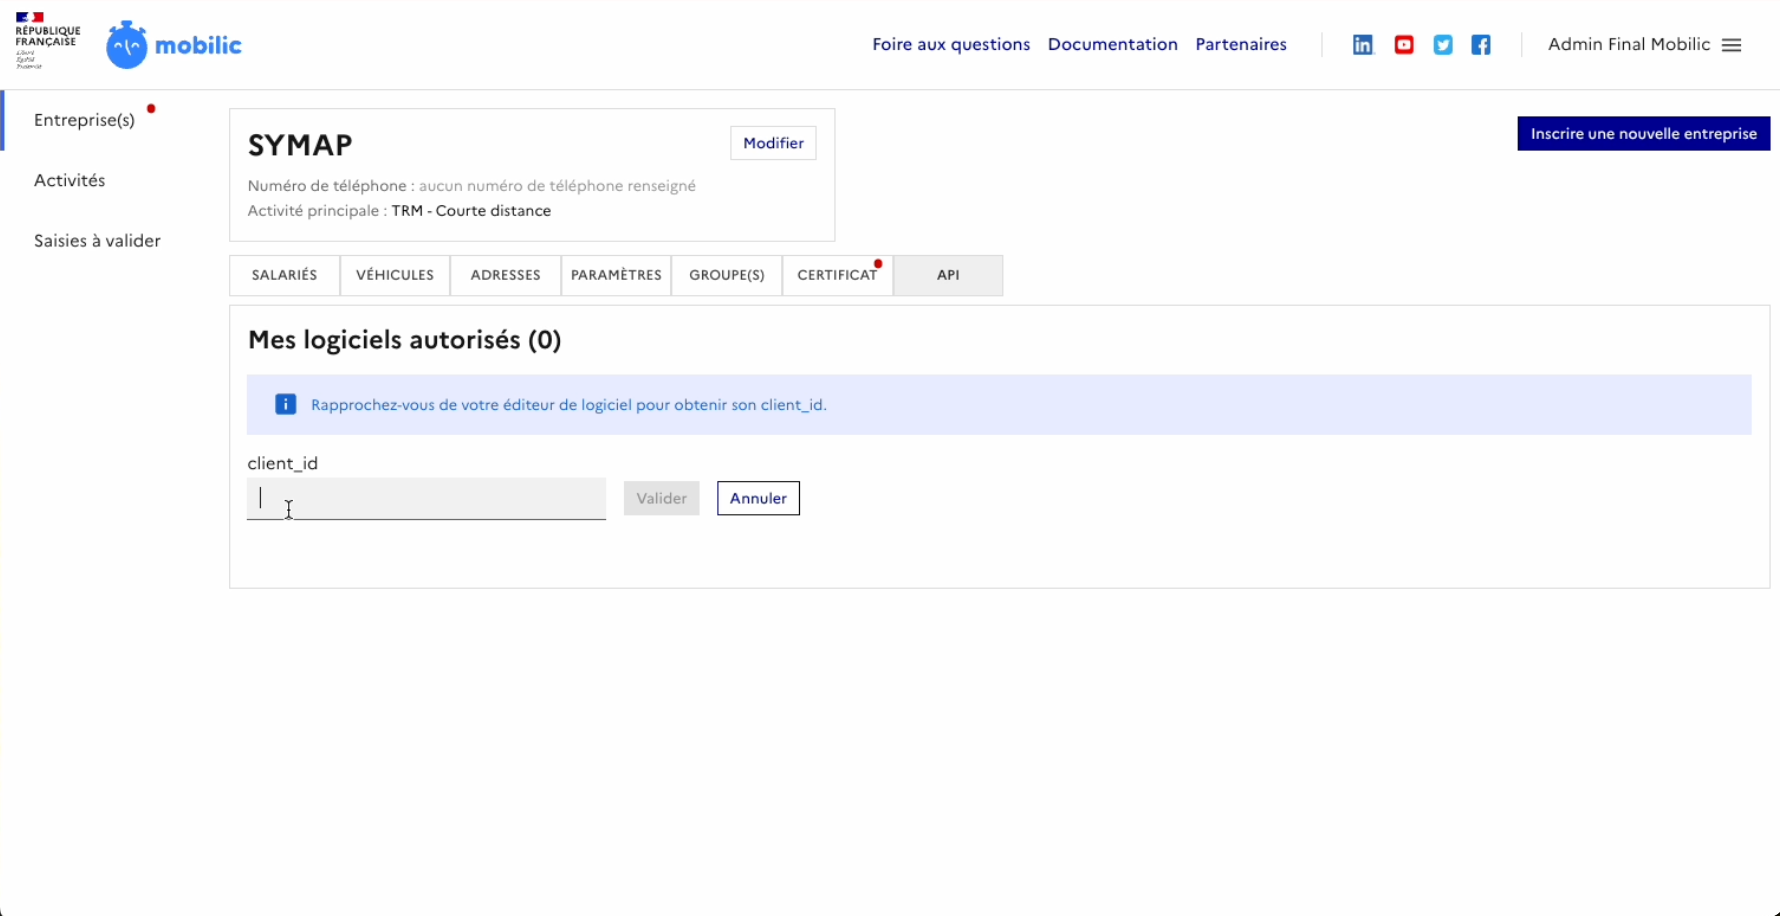
Open the Mobilic API Interface. Go to Enterprise(s) > API

In Mobilic, click on “Ajouter un client ID”
Paste the Kenjo Client ID and click "Valider"

You will receive an “Identifiant de société”

Go back to Kenjo and paste this value into the required field

Click on “Connect to Mobilic”
If successful, you will see a confirmation message

Click “OK, got it”
? Great! Kenjo is now connected to Mobilic. Let’s invite your employees next.
Learn How to Invite Employees to Mobilic
Once the integration is set up, you can decide which employees should use Mobilic.
Go to Attendance > Mobilic Integration
You’ll see a list of all employees in Kenjo
Click the three-dot menu next to an employee > Activate for Mobilic

The employee’s status changes to "Waiting for Validation"

The employee will receive an email from Mobilic with instructions to accept the integration with Kenjo
This step is mandatory for each employee in order to sync time entries.
Want to activate multiple employees at once?
Select multiple employees
Click Actions > Activate for Mobilic
All selected employees will receive their Mobilic activation email
Note: Kenjo admins will also be admins in Mobilic.
What Employees Need to Do
Open the email from Mobilic
Follow the instructions to activate the account

Next time they log into the Kenjo mobile app, their status will change to "Active" in Kenjo, once they accepted the mail

Important: Only employees with the status "Active" will see the extra Mobilic fields and have their entries synced. Make sure everyone completes the email validation before starting time tracking.
Learn About the Time Tracking Flow and Mobilic Fields
Once an employee is active, they’ll see additional Mobilic-specific fields during time tracking in Kenjo.
Note: Make sure that Geo Location is active in the employees policy. Attendance > Settings > Attendance Policies > Location tracking
During Check-In
Employees will be prompted to fill in:
Start mileage
Vehicle number

ℹ️ These are mandatory to complete the check-in.
During Check-Out
Employees must enter:
End mileage
Confirm to check out

ℹ️ This is mandatory to complete the check-in.
After Check-Out – Approval by employees
A summary screen appears where employees can approve the entry

We recommend approving the entry immediately.
Alternatively, employees can go to Timesheet > Today to approve later.
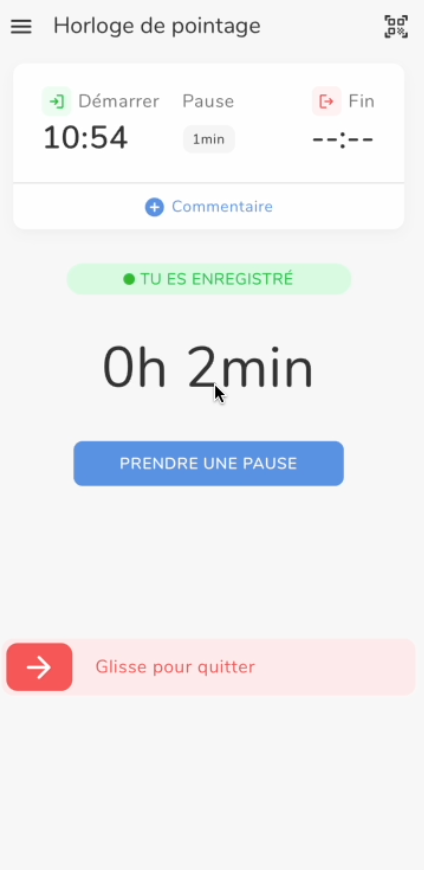
Open the QR Code during a control
Employees needs to open the mobile app > punch clock. Here he can click on the QR Code icon in order to generate the QR Code

Approval by Manager
After the employee approves their entry, you (as the manager) can also approve it.
Go to Attendance > Attendance Summary (desktop)
Choose to:
Approve entries in bulk, or
Open an employee's details and approve individual entries

You can also see if the employee has completed the activation process here.
Note: You can only approve entries that are already approved by the employee.
Summary
With the Mobilic integration in Kenjo, you get a seamless and compliant time tracking solution. Once the setup is complete and employees are activated:
All time entries are tracked in Kenjo
Mobilic fields are automatically synced
No need to switch tools
Full transparency and approval flows for employees and managers
If you need additional support, feel free to reach out to our support team anytime.
Was this article helpful?
That’s Great!
Thank you for your feedback
Sorry! We couldn't be helpful
Thank you for your feedback
Feedback sent
We appreciate your effort and will try to fix the article